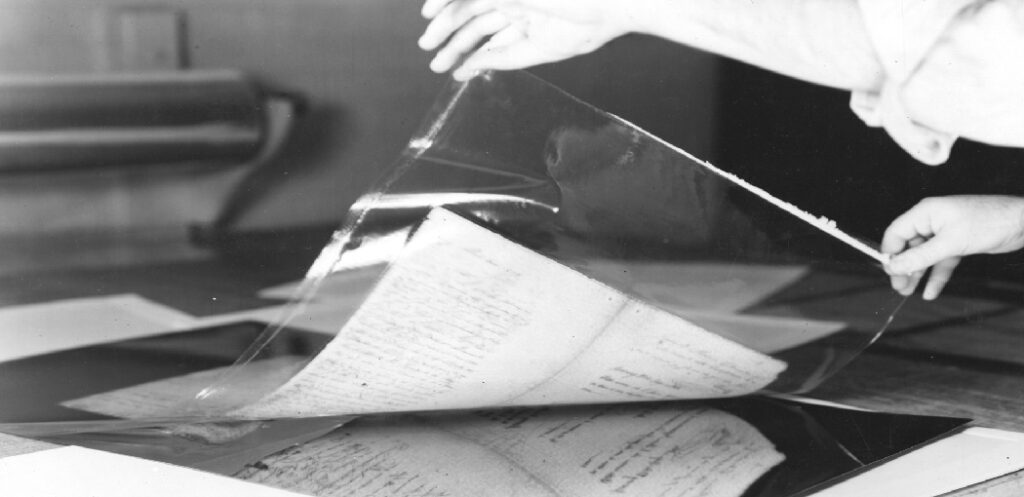
If you have ever tried to remove lamination from paper, you know it can be a frustrating process. The plastic material is difficult to peel off without damaging the underlying paper. In this article, we will share some tips on how to remove lamination from paper quickly and easily. With a bit of patience and the right tools, you can get rid of that pesky lamination!

Lamination is a process used to protect paper from wear and tear. It also makes the paper less likely to absorb moisture, making it a popular choice for items that will be handled or used outdoors. However, lamination can also hinder when you need to make changes to the underlying paper.
Things You’ll Need:
- Heated iron
- Parchment paper
- Clothes iron
- Ironing board
- Hairdryer (optional)
- Scissors
- Sticky tape
- Laminated paper
A Step by Step Guide on How to Remove Lamination From Paper
Step 1: Determine the Technique
There are a few ways to remove the lamination from paper- each with its instructions. Choose the technique that will work best for your project.
Step 2: Preheat the Iron
Before peeling the laminate off, you need to preheat your iron. This will help soften the adhesive, so it’s easier to remove. Place your iron on the highest setting and wait for it to heat up.
Step 3: Place Parchment Paper on Top of Laminated Paper
If you’re using a clothes iron, place parchment paper on the laminated paper. This will help protect your iron and the surface it’s being ironed on from sticking to the laminated paper.
Step 4: Iron on Low Heat Setting
Start by ironing on a low heat setting. Then, slowly move the iron back and forth over the laminated paper. Apply pressure while you’re ironing to help loosen the adhesive.
Step 5: Peel Off Lamination
Once the majority of the adhesive has been loosened, start peeling off the lamination. Use caution as the laminate can be sharp and may cause cuts. If some adhesives remain, continue to iron them off using Steps 4 and 5.
Step 6: Trim Excess Paper
If any excess paper remains after removing the lamination, use scissors to trim it away. Be careful not to cut any of the attached paper fibers.
Step 7: Tape Edges (optional)
To prevent any further fraying of the paper edges, you can tape them down using sticky tape. This will also help keep the edges from curling up.
Step 8: Let the Paper Dry
Once you’ve completed all the steps, let the paper dry completely before using it. Depending on the type of adhesive used, it can take a few hours or a few days for the paper to be fully dry.
Removing lamination from paper can be a challenging task, but you’ll be able to do it in no time with these simple steps. Follow these instructions, and you’ll be able to remove the adhesive without damaging the paper successfully. Happy crafting!
Tips and Warnings:
Tips:
- If the adhesive is particularly strong, you may need to apply more heat or use a stronger solvent.
- Be sure to work in a well-ventilated area when using solvents, and wear gloves and safety glasses.
- Take care when using sharp objects around the laminated paper, as they can easily puncture the film.
Warnings:
- Do not use a heat gun on paper that has been laminated more than once, as it may damage the paper.
- Do not use solvents near an open flame.
- Keep children and pets away from any area where solvents are being used.
Removing lamination from paper can be a difficult task, but with the right tools and techniques, it can be done. In most cases, the easiest way to remove lamination is by using a heat source such as a hairdryer or heat gun.
With a little bit of patience and effort, you should be able to remove the lamination from your paper and restore it to its original state.
How Do You Remove Stuck Paper From Lamination?
Removing stuck paper from lamination can be difficult, but it is not impossible. There are a few different methods you can try to remove the paper.
One way to remove the paper is to use a hairdryer. Turn the hairdryer on and hold it about six inches away from the paper. The heat will help loosen the adhesive, and the paper should peel off relatively easily.
Another option is to use Goo Gone or another adhesive remover. Apply the adhesive remover to a cloth and rub it onto the laminated paper. The adhesive should loosen, and the paper should come off quickly.
If neither of these methods works, you may need to take more drastic measures. You can try using a razor blade to cut the paper off of the lamination. Be very careful when doing this, as you do not want to damage the lamination.
Once the paper is removed, you can try to repair any damage that was done to the lamination. There are a few ways to do this.
If the laminated area is small, you can use a glue stick to reapply the adhesive. If the area is larger, you may need a contact adhesive. Be sure to follow the directions on the adhesive carefully, as each type of adhesive has different instructions.
Which Documents Should Not Be Laminated?
There are several types of documents that should not be laminated. These include:
- Birth certificates
- Marriage licenses
- Social security cards
- Driver’s licenses
- Passports
- Admission tickets
- School transcripts
If you have any of these documents, it is essential to keep them in a safe place and not laminate them. If you do laminate them, there is a chance that you will damage them, and they will be difficult to read or use.
Conclusion:
So, there you have it! We’ve shown you how to remove lamination from paper. This process is simple and easy to follow. Be sure to test the method on a small area of your paper before applying it to the entire surface. Removing lamination can be a great way to restore old documents or photos and give them a new lease on life. Have you tried this method before? What did you think? Let us know in the comments below.

